
1. User Guide
Everything you need to know about installation, database setup, code generation, and local modeling is documented in our complete User Guide. Download the full documentation package below to start optimizing your workflows.
View / Download PDF2. Overview
xINvisionQ.Studio is an integrated developer workspace designed to bridge multi-database management, schema-driven code generation, and AI time-series forecasting into a single unified application.
Supported Database Engines:
- Microsoft SQL Server
- Oracle Database
- MySQL
- PostgreSQL
Supported Languages:
- Python
- C#
- Java
- & More
Supported Forecasting Files:
- CSV: .csv
- Text: .txt
3. Getting Started
Prerequisites
Ensure your system meets the following requirements before launching the studio:
- Windows 10/11 or Windows Server (64-bit)
- .NET Framework 4.8
Installation
- Download the setup archive or standalone executable.
- Run
xINvisionQStudio.exe.
4. Database Explorer
Connect and run queries across different DBMS engines simultaneously without switching client applications.
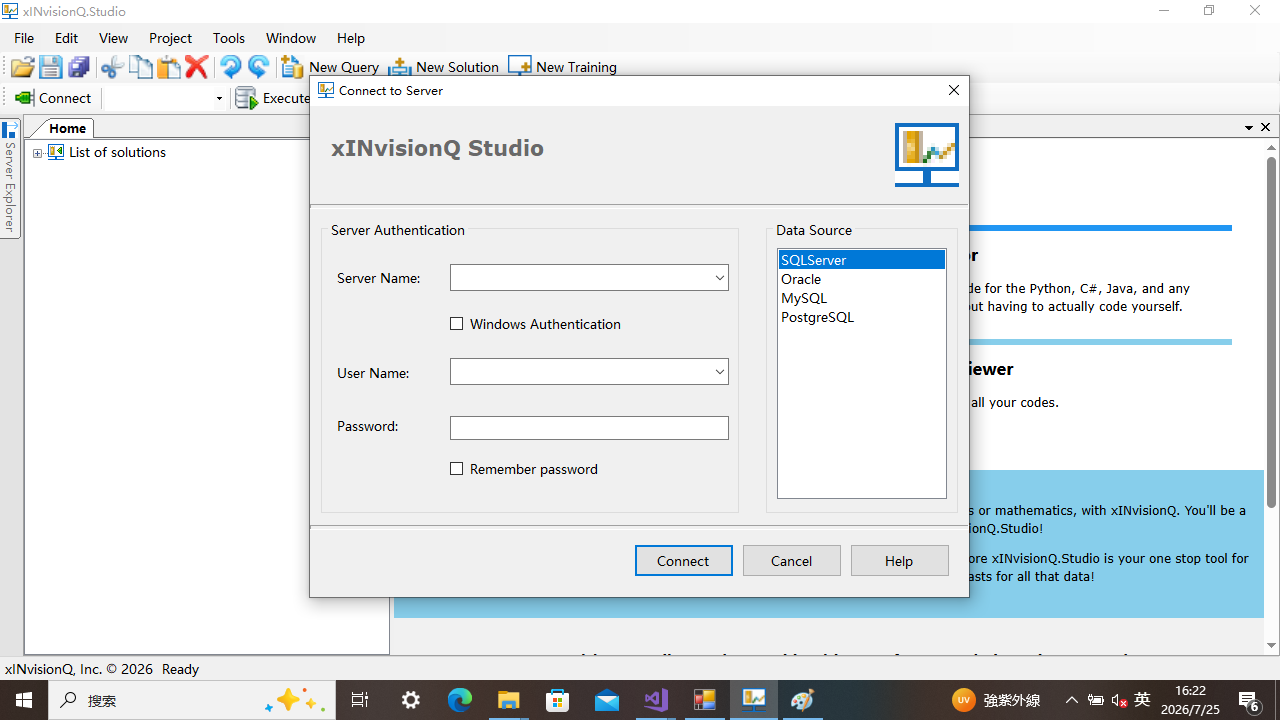
Connecting to a Database
- Click Connect in the Server Explorer sidebar.
- Select your engine type (e.g.,
SQL ServerorPostgreSQL). - Provide host details, database name, and authentication credentials.
- Click Connect to connect to databases and view tables, views, and schemas.
Explore
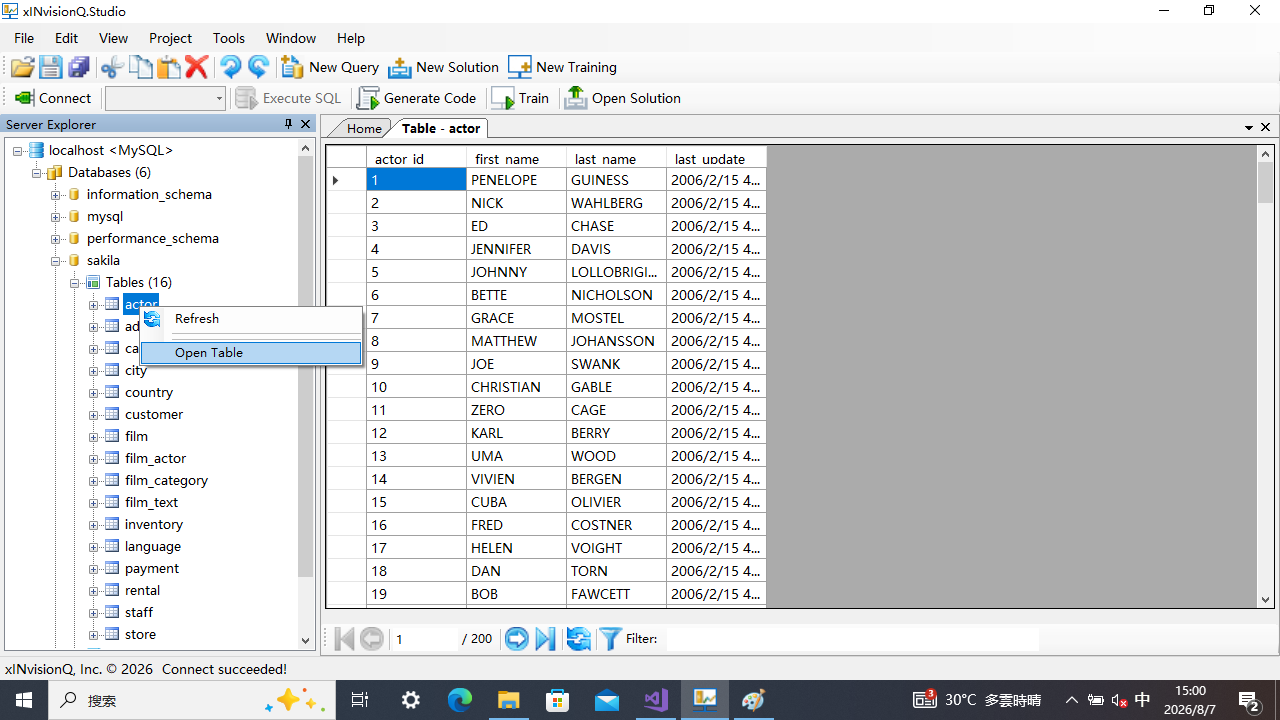
- You can explore the databases you connected to by viewing all the connected databases in the server explorer tab on the left, which you can keep permanently open by clicking the pin button on the right.
- By right clicking the table and clicking Open Table after expanding the database you can open all the data of the table in the central panel. From here you can view, insert, update, delete, and filter the data.
Query
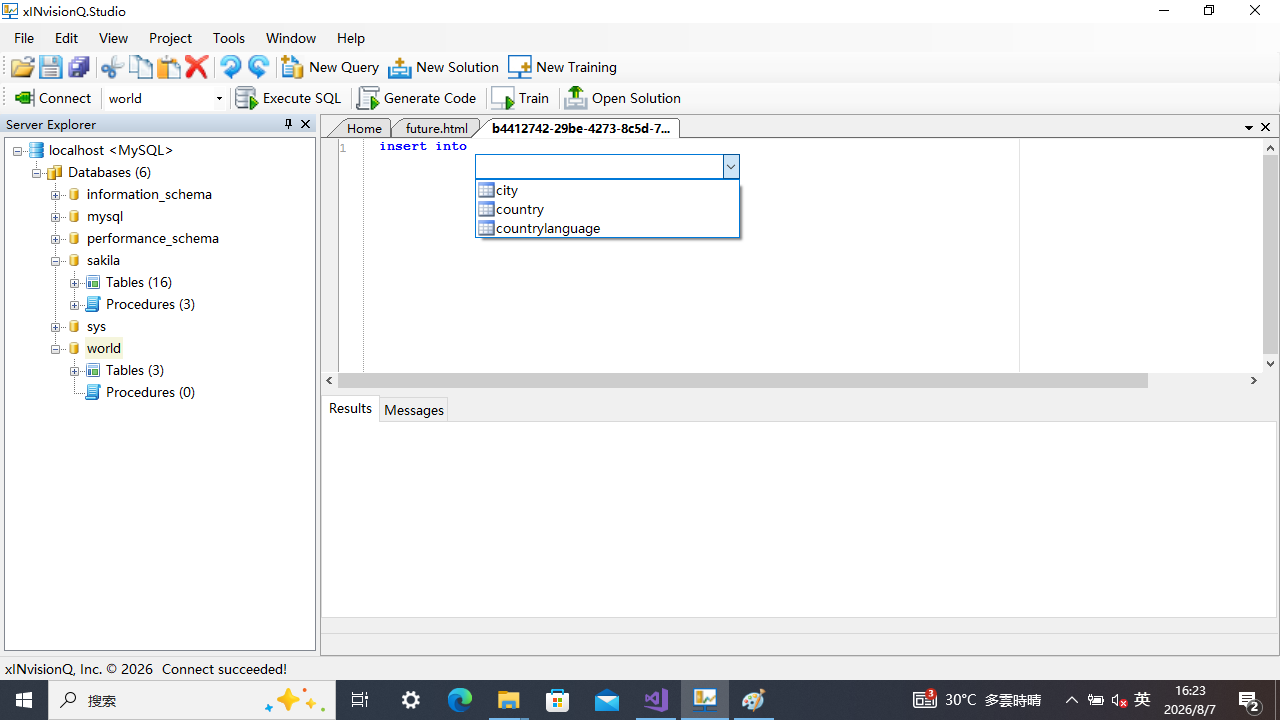
- Click New Query in the navbar to execute a new query, then type in your desired query, and complete it by clicking Execute SQL. Advanced features include syntax highlighting and SQL autocomplete.
Advanced Features
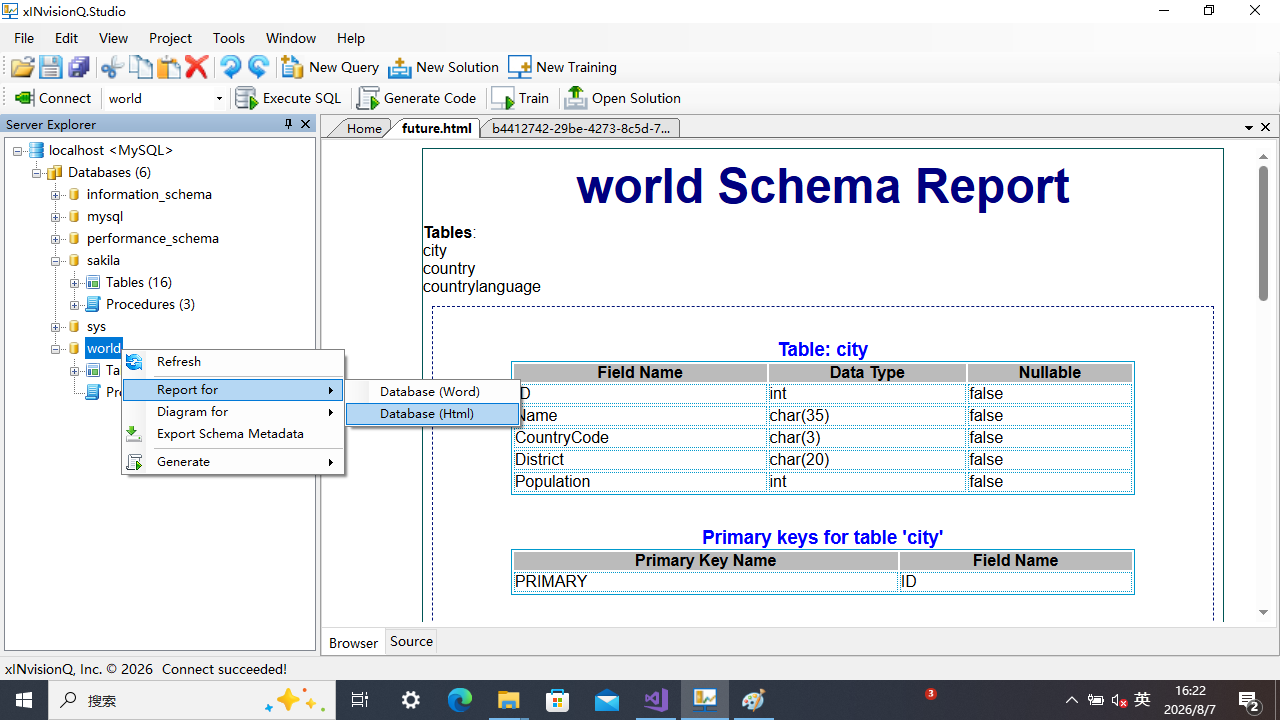
- To get started, simply right-click your database: hover over and choose Report for: Database (Word) or Database (HTML) to generate a report in HTML or Word Doc format; Diagram for: Entity-Relationship Diagram to generate a Entity-Relationship Diagram; Export Schema Metadata to export the entire database's schema metadata to XML entities which is then used as a model for offline code generation; and Generate to activate a customized code generator plugged in directly to your database — our proprietary feature that automatically allows you to generate any code you wish from that database.
5. Code Generator
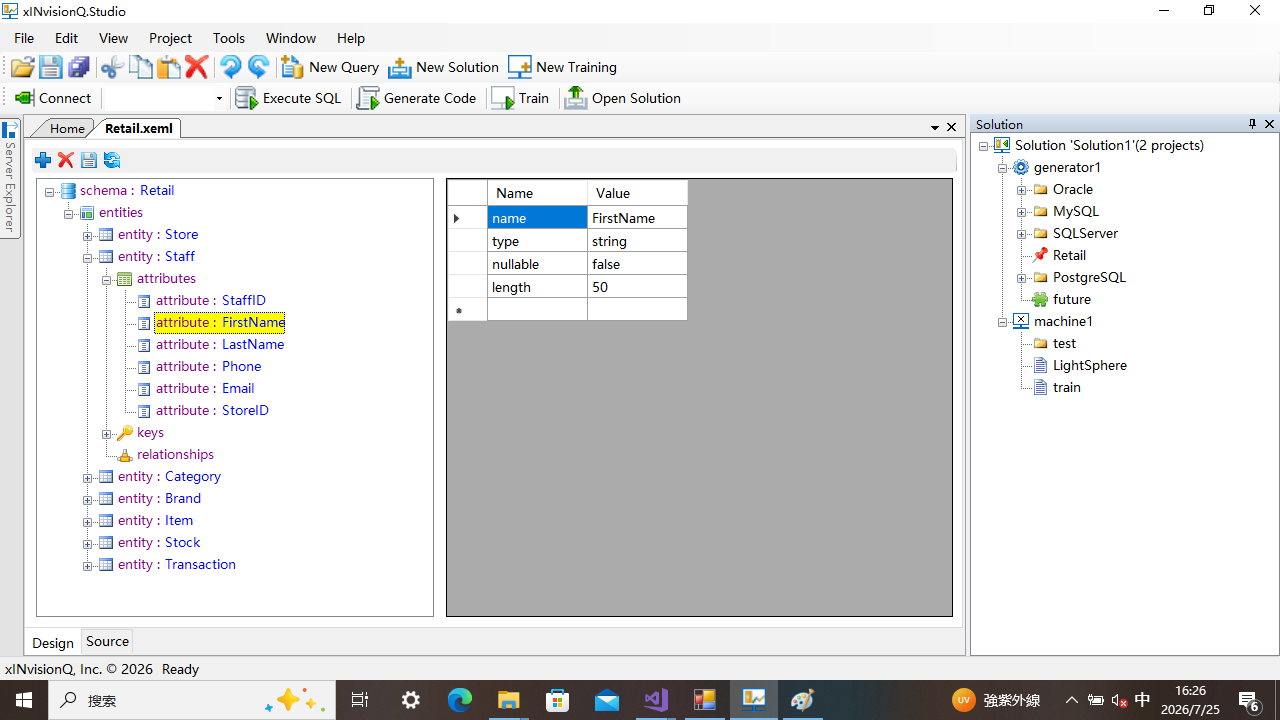
The code generation architecture is model-driven, where basically you define one model and create multiple templates to generate any code you wish. You can directly export models from the database(s) SQL server, Oracle, MySQL, and PostgreSQL, or you can use the provided entity editor to build the model by yourself.
Define model
- Click New Solution in the taskbar to create a solution.
- Right click the solution followed by clicking Generator from the dropdown menu to create a new generator.
- Right click the newly created Generator to then create a new model or import an existing model.
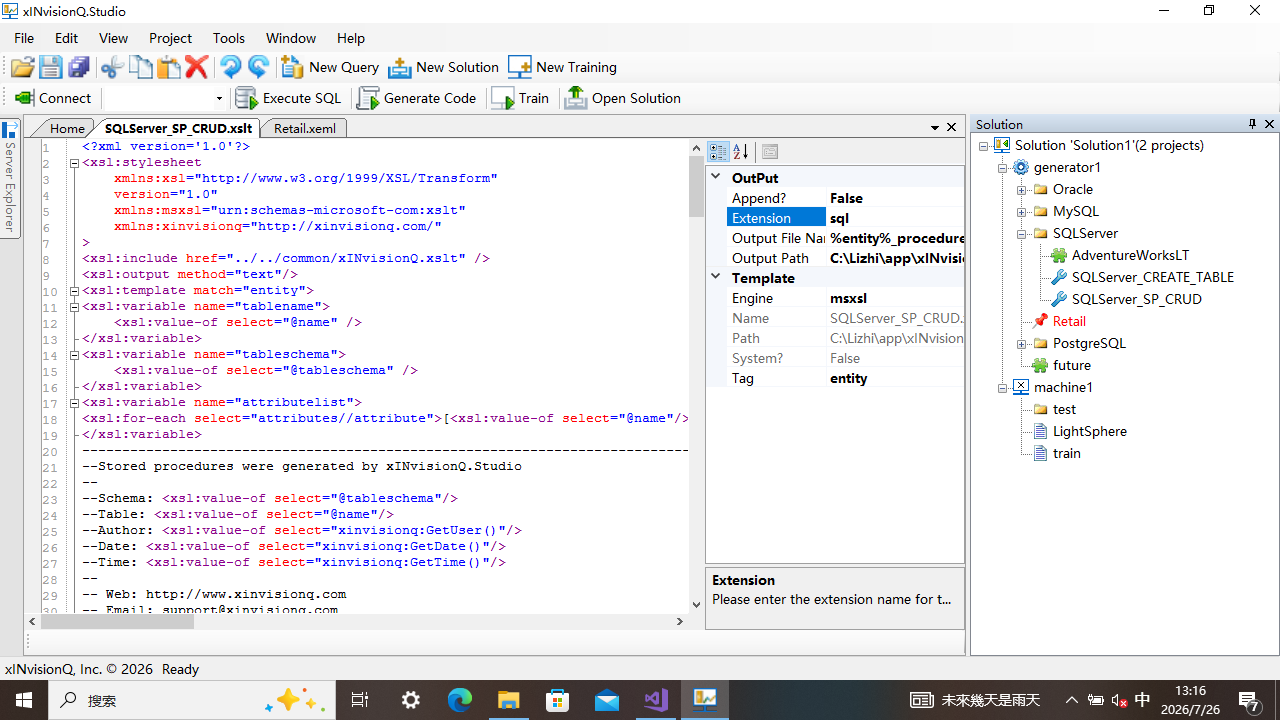
Create Template
- Create a template or use an existing one to generate code.
- You can choose which extension, name the outputted file, and where to save the generated code to your local machine.
- You must first set an active model to be used, then select which generator to use - only until those are set then you can generate code.
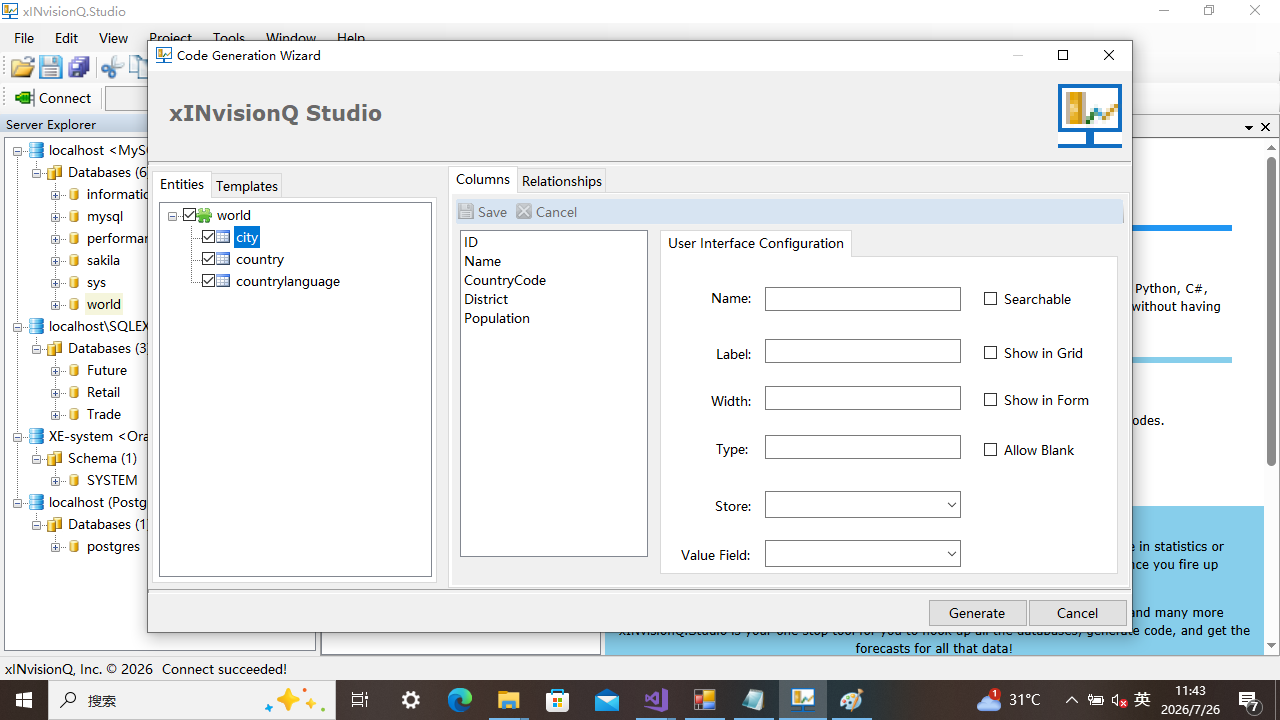
Run code generator
- Click the Generate Code button to generate code. You will be prompted once the code is generated.
- You can choose which entities and templates to use to generate the code you wish.
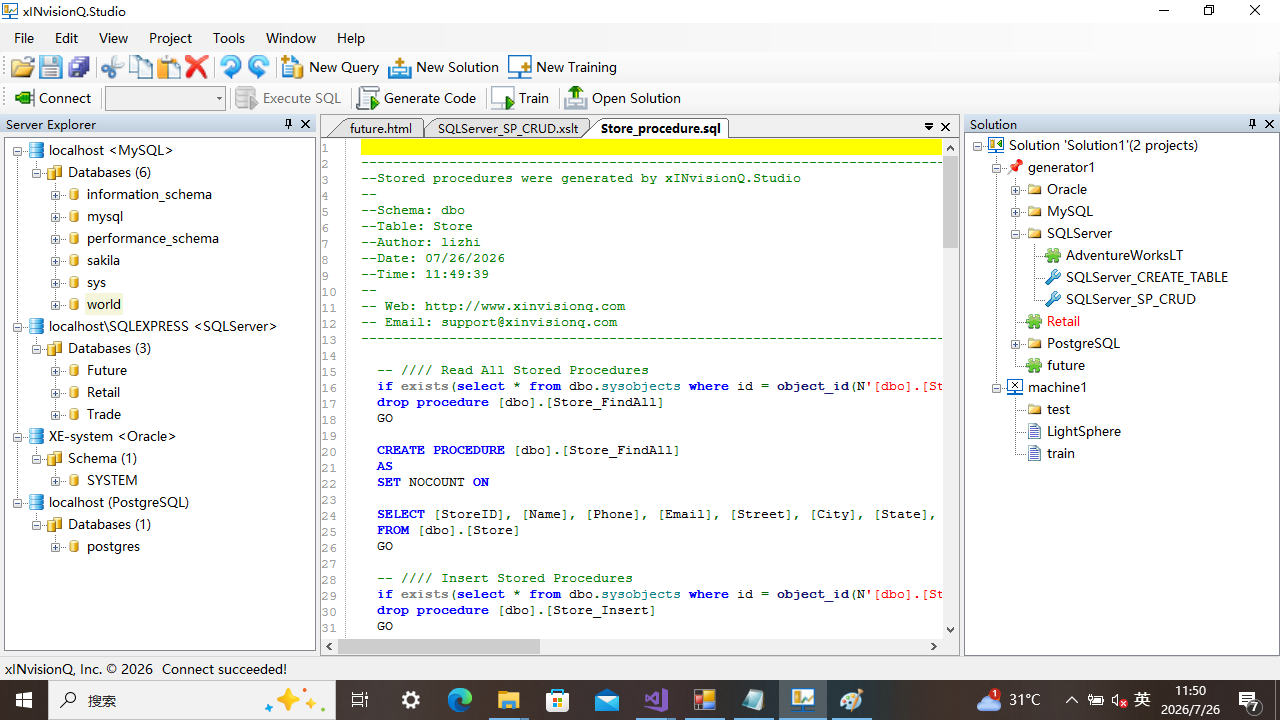
- Once generated, you can view the generated code by opening the file that was saved.
6. Evolutionary Forecasting Engine
xINvisionQ features built-in time-series and sequential data forecasting powered by specialized evolutionary algorithms. Produce forecasts with xINvisionQ.Studio in three simple steps: load the data, configure the parameters, and run the forecast.
Load Data
- Create a new solution or use an existent one.
- Create a new machine by right clicking the solution or reuse an existent one.
- Right click the machine to import existing data or create new data.
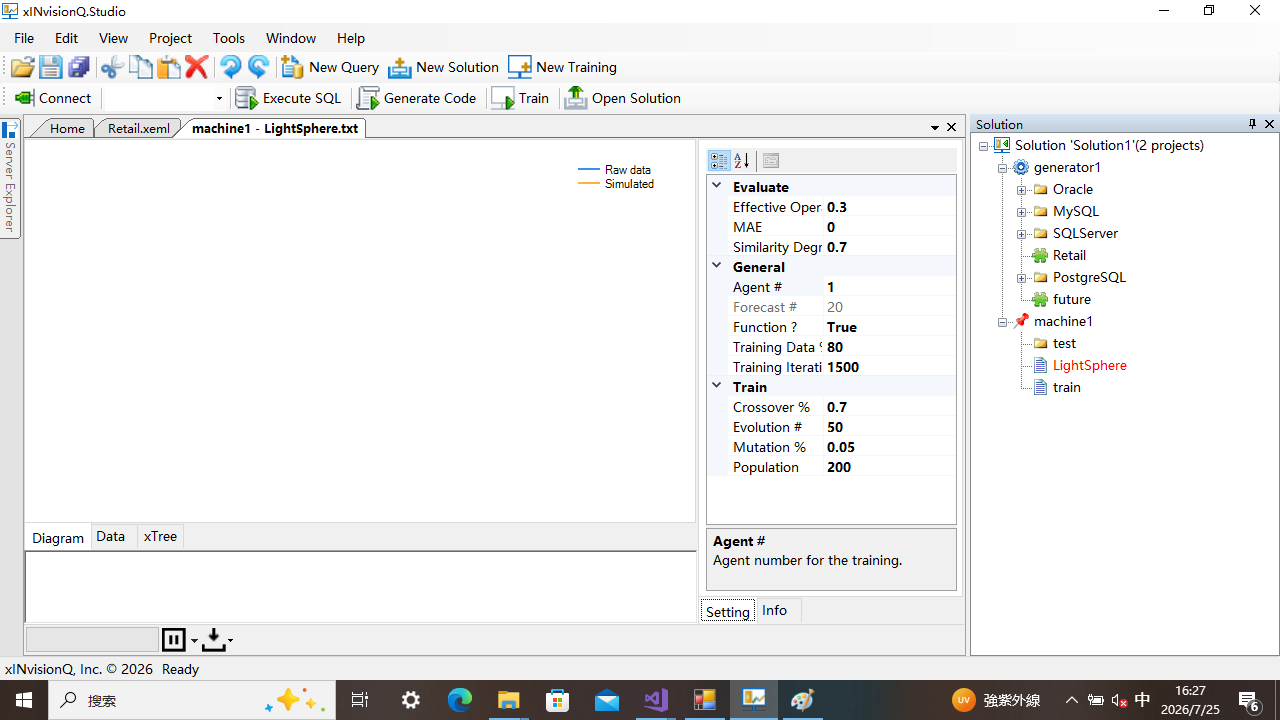
Configure
- Set the data as the active model first, then select the machine to be used for forecasting, and after those are set you can procced to click the new training button in the toolbar.
- Set the desired parameters.
- The Function? parameter is for which type of forecast you wish to produce, set it to True for a classical forecast that’ll produce a function, set it to False if you wish to produce a probabilistic forecast.
Run Forecasts
- Click the Train button in the toolbar to start training.
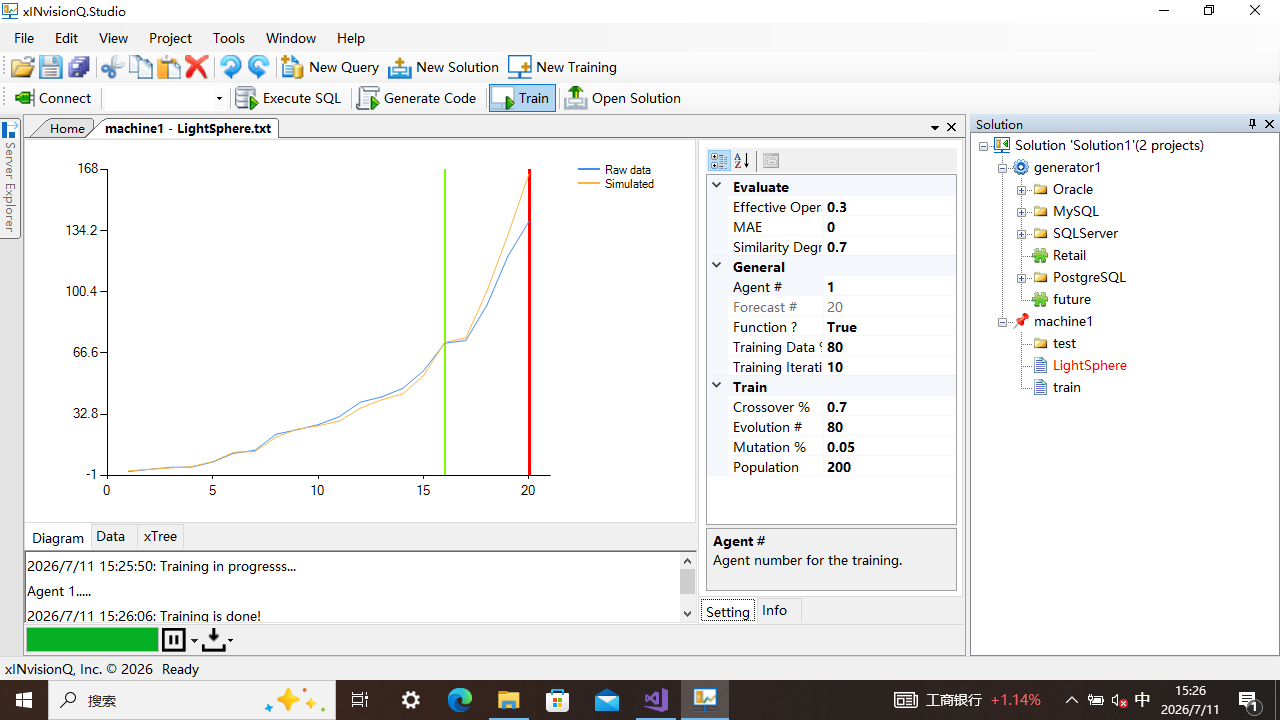
- Once the training and forecast is completed the results will be displayed as shown in the example below.
- The green progress bar is a live detailed progress indicator; the pause button allows training to be paused and terminated; the save button allows you to save the data and diagram of the training and forecast results; the diagram, data, and formula are shown in the Diagram, Data, and xTree tabs respectively.
7. Troubleshooting & Support
If you encounter connection errors or application crashes, check the following:
- Logs Location: Application logs are stored locally at
%AppData%\xINvisionQ\Logs. - Email Support: If you encounter any other issues, please email us the log files to support@xinvisionq.com.